Introduction to C#
The C# language is used to create applications that display on a black window referred to as the DOS prompt or DOS window. Those are the types of applications we will create in our lessons. To study the C# language, we will use Microsoft Visual C# 2008 Express Edition or Microsoft Visual C# 2008 Professional. To get Microsoft Visual C# 2008 Express Edition, you can download it free from the Microsoft web site. After downloading it, you can install it. To launch Microsoft Visual C# 2008 Express Edition, you can click Start -> (All) Programs -> Microsoft Visual C# 2008 Expression Edition: |
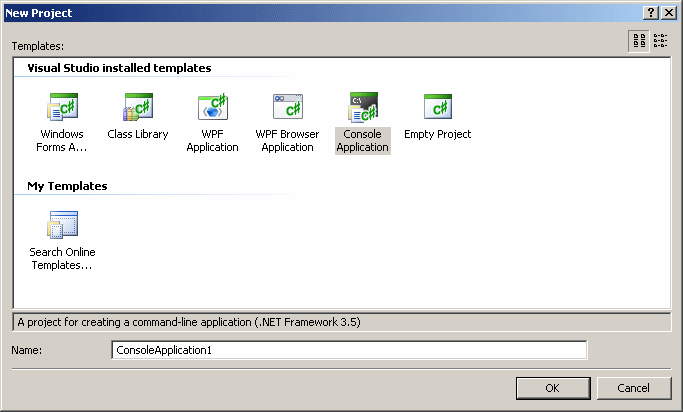
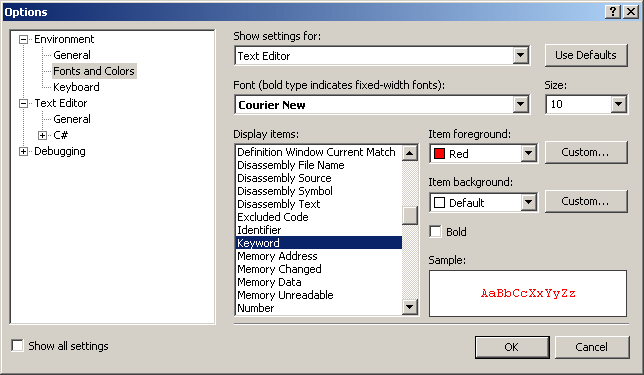
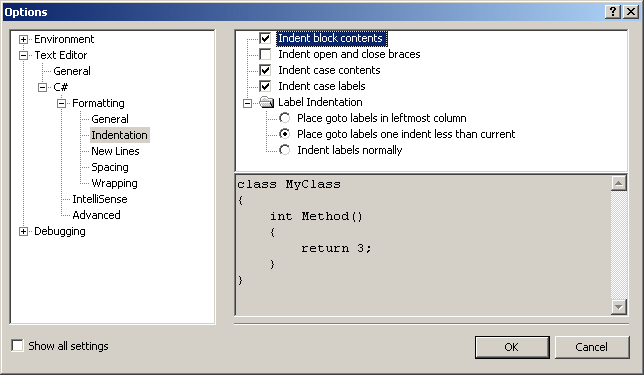
We have seen how to create a console application. Microsoft Visual C# allows you to create various other types of applications. This is why you should first display the New Project dialog box to select your option. Besides console applications, in future lessons, we will start some applications with the Empty Project. We will also learn how to create a library using the Class Library option. We will ignore the other three options in this book. To control the indentation of your code, on the main menu, click Tools -> Options… In the left list, expand C#, followed by Formatting and click Indentation. Then change the options on the right side:
After making the changes, click OK to validate or Cancel to ignore.
In previous versions of Microsoft Visual C# (namely 2002 and 2003), you always had to formally create a project in order to use one and you always had to save it. After realizing that many of the projects that developers or students create are for experimental purposes, Microsoft provided the ability to only temporarily create a project, then to save it or not. Saving a project allows you to keep on a medium so you can refer to it later. When Microsoft Visual Studio 2008 (any edition) is installed, it creates a folder named Visual Studio 2008 in your My Documents folder. The My Documents folder is called your personal drive or your personal directory. Inside of the Visual Studio 2008 folder, it creates a sub-folder named Projects. By default, this is where it would save your projects, each with its own folder. To save a project, on the Standard toolbar, you can click the Save All button File -> Save All. If the project had already been saved but you want to save it under a different name, on the main menu, you can click File -> Save project name As…
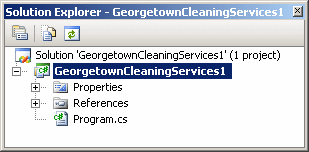
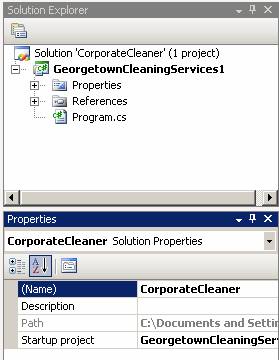
A solution is used to coordinate the different aspects of an application that is being created. When you create a project, it represents one detail of the application you have in mind. Besides the code you are writing, you may want to add other items. Instead of one project, in the next sections, we will see that a solution can contain more than one project. When creating a project, the solution holds the same name as the project. You can see their names in the Solution Explorer:
The solution and a project can have different names. While working on a project, to rename the solution, in the Solution Explorer, you can click the first node, which is the name of the solution starting with Solution. Then, in the Properties window, click (Name) and type the name of your choice:
This name is temporary, especially if you have not yet saved the project. If you want to permanently save a solution for later use, there are two techniques you can use. If you start saving a project for the first time, it would bring the Save Project dialog box. By default, Microsoft Visual Studio selects your personal directory as the path to the solution. This is called the location. In the location, Microsoft Visual Studio creates a folder as the solution of the project. The solution must have, or must be stored, in its own folder. As mentioned earlier, Microsoft Visual Studio uses the name of the project as the name of the solution. To rename the solution, you can change the string in the Solution Name text box. Remember that you can enter the name of the project in the Name text box. Here is an example:
When you save a project (for the first time), by default, Microsoft Visual C# creates a new folder for it in the My Documents\Visual Studio 2008\Projects folder. It uses the name of the solution to name the folder. It creates some files and stores them in that new folder. Then, it creates a sub-folder, using the name of the project, inside of the folder of the solution. Besides the sub-folder with the name as the project, it creates another folder named debug. It also creates another folder named Debug in the sub-folder of the name of the project. In each folder and some other folders, it creates some files that we will not pay attention to for now. If the project had already been saved but you want to change the name of the solution, on the main menu, you can click File -> Save solution-name.sln As… This would bring the Save File As dialog box where you can specify the name of the solution and click Save.
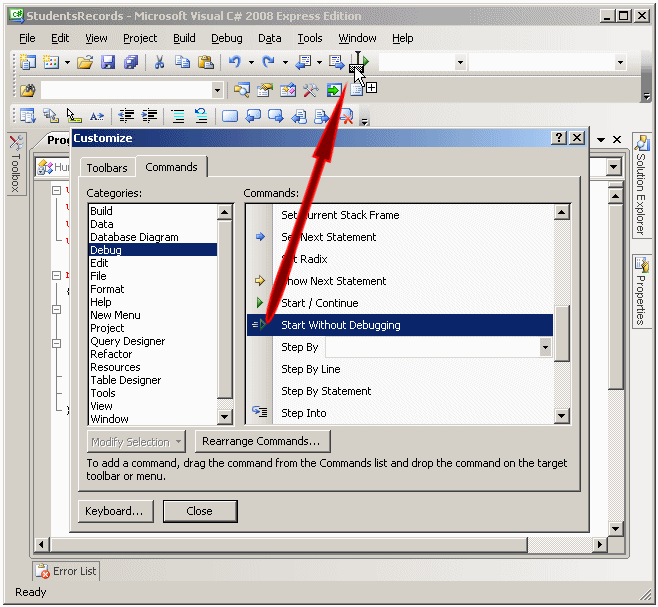
After creating a project and writing code, you may want to see the result. To do this, you must execute the application. This would create an executable that you can use on other computers and that you can distribute to other people. To execute an application, on the main menu, you can click Debug -> Start Without Debugging. Instead of going through the main menu every time, you can add the Start Without Debugging button to a toolbar. To do this, you can right-click any toolbar and click Customize… In the Commands property page of the Customize dialog box, you can click Debug in the Categories click, then drag Start Without Debugging, and drop it on a toolbar. Here is an example:
After adding the button(s), you can click Close. The next time you want to execute an application, you can just click this button.
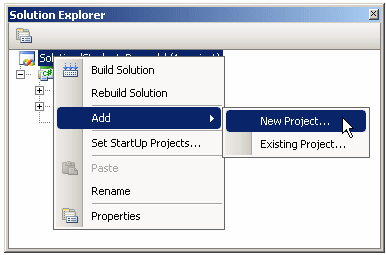
One of the most valuable features of Microsoft Visual Studio 2005 is that it allows you to work on more than one project without launching more than one instance of the studio. This means that you can add a project to another project you are working on and treat each as a separate entity. Before adding one project to another, you must save, or you must have saved, the current project. To add a project, in the Solution Explorer, you can right-click the most top node (it starts with Solution) and position the mouse on Add:
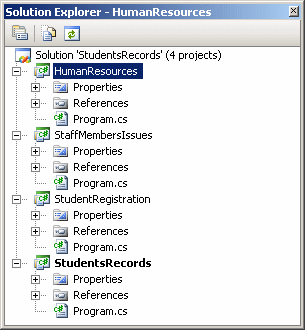
If you have a project that was previously saved but you don’t want to open a separate instance of Microsoft Visual Studio for it, you can click Existing Project… This would bring the Add Existing Project dialog box that allows you to select a project from a folder. To add a new project, after right-clicking, you can click New Project… If you add a new project, and if you want to keep it for future references, you must save it. To save the new project, you can click the Save All button new project, a folder with its name would be created inside of the folder of the solution. On the right side of the name of the solution in Solution, the number of its projects is specified in parentheses, as 1 project, or 2 projects, etc. After adding a project, each would be represented by its own node in the Solution Explorer and in the Class View. Here is an example:
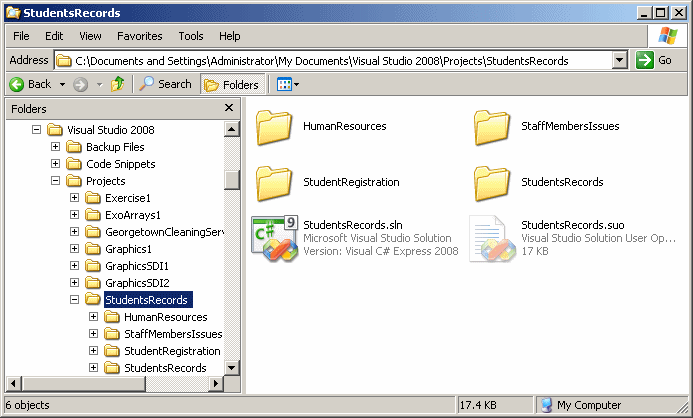
Also, a sub-folder for each project is created in the folder of the solution:
In the Solution, the name of one of the projects, if there is more than one, is in bold characters. This project is called the StartUp Project. If, on the main menu, you click Debug -> Start Without Debugging, the project in bold characters would be executed. If you want to change the start up project, you can right-click its node and click Set As StartUp Project.
|
10,314 total views, 2 views today

